This design is getting better all the time so bookmark this page and check back often!
For a smaller design checkout https://www.mygrowbot.com/mmka/
Please comment below for questions, comments, suggestions – I will keep incorporating them into the doc!
Super Size Model M in Action!
While your kit is on it’s way! Start Building and Planting!
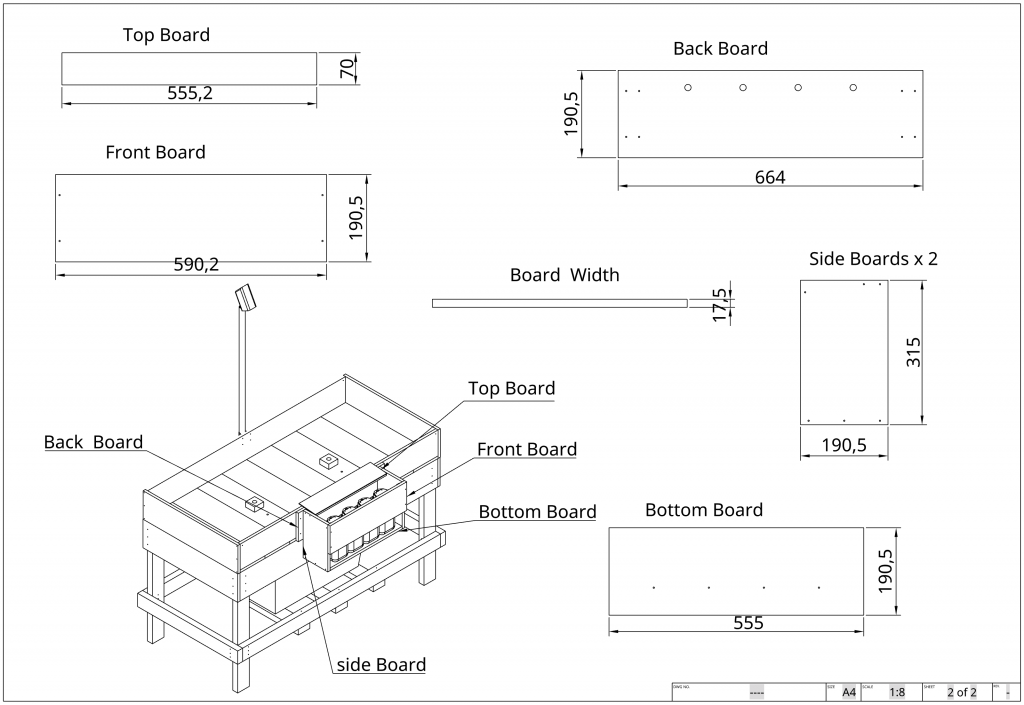
Materials for Wooden Tank and Stand
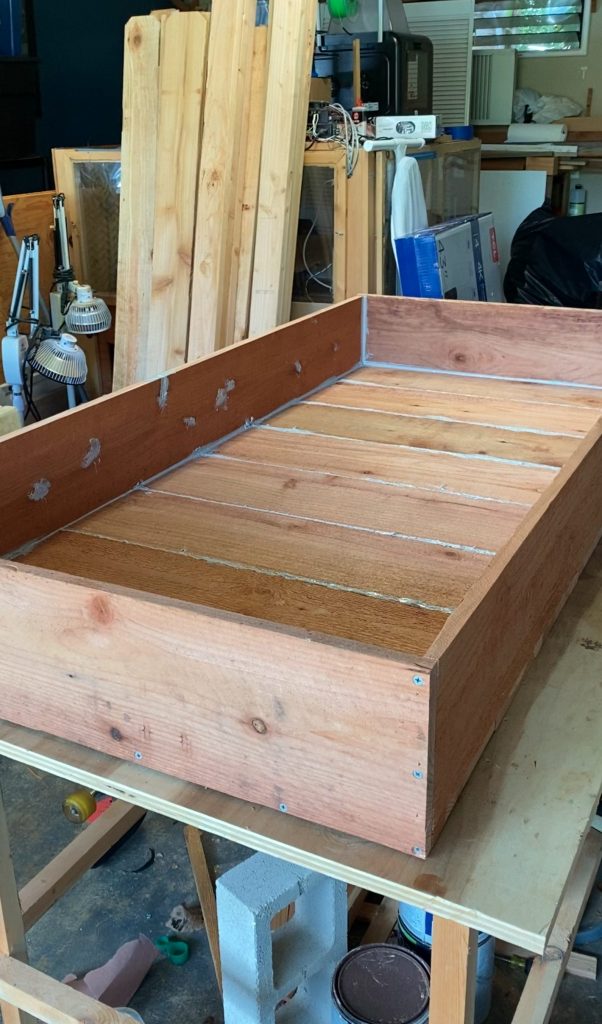
- wooden tank: 8 red wood fence boards from home depot- 11/16″X7-1/2″X6′ FSC REDWOOD HRT DE
- stand
- 5 or 6 treated 2×4’s
- 2 – 11/16″X7-1/2″X6′ FSC REDWOOD HRT DE
- 10 5 gallon felt growbags
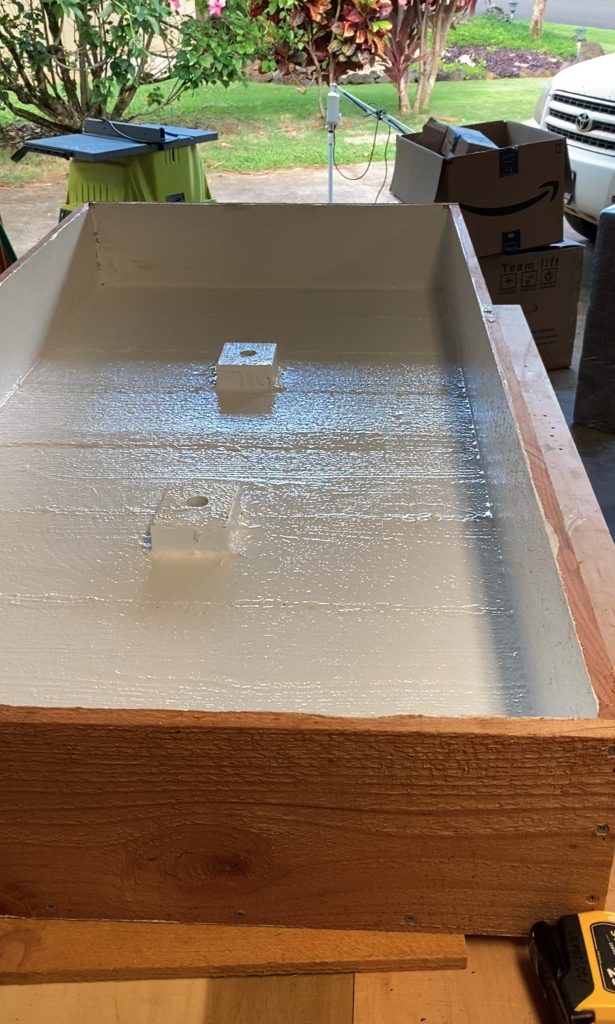
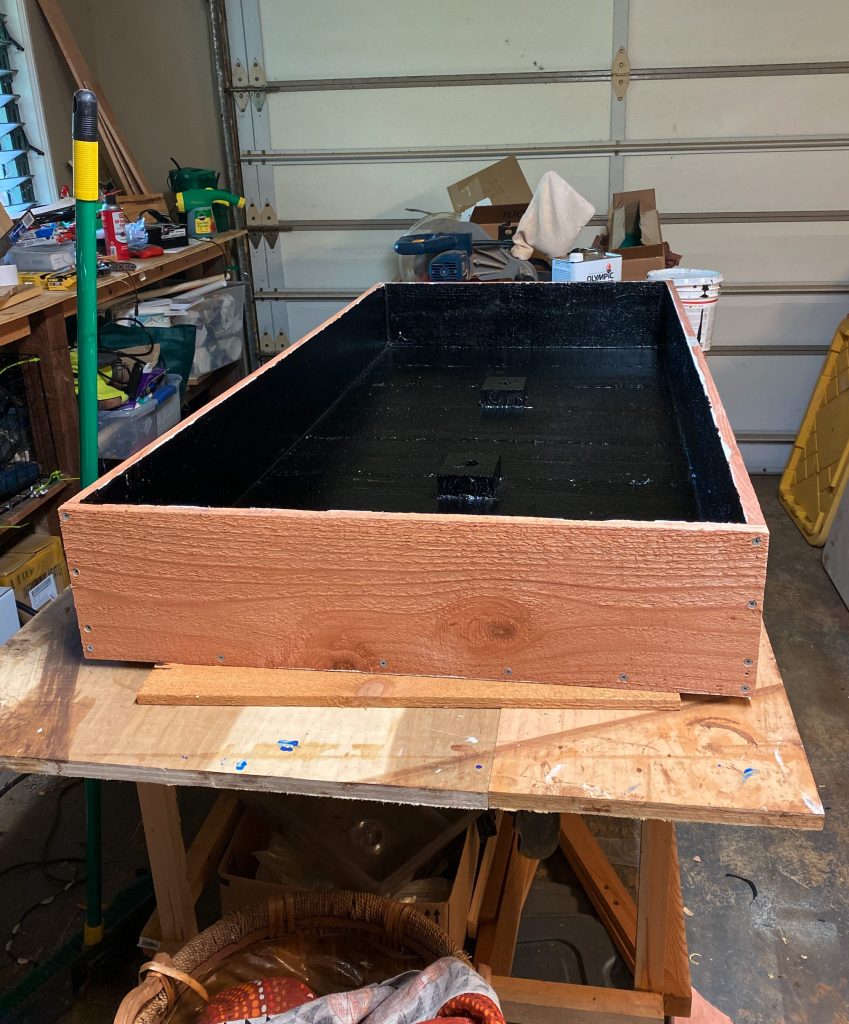
- primer
- water tank(non-toxic/potable water) paint/sealer
- a tube of roofing leak sealer
Start your veges growing!
Each 5 gallon growbag can grow several plants. 5 or six carrots, 2 tomatoes, 3 cucumbers, 5 lettuce, 3 kale, 3 chard, + herbs. So depending on what you plant you might have 40ish plants! Even potatoes then it depends on the potato but 2 to 3 plants per bag is good. Climbing and big bush plants should be put on any edge other than the one that would cause plants to grow over the solar panel. As big bush and climbing plants grow outside the box use wire clamps to affix tomato cages and other trellis options.
Start growing seeds now. The bots should be pretty easy to build for people comfortable with wood working.
3. Put the seeded seed starters in Tupperwares containers with sealed lids and put them on top of your fridge open once a day – some seeds take longer! Once the seeds have started sprouting but the container outside with the lid off and make sure to keep a little water on the bottom at all times!
While your seeds are starting build your tank and frame!
A picture is worth a thousand words. Here are multiple pictures!
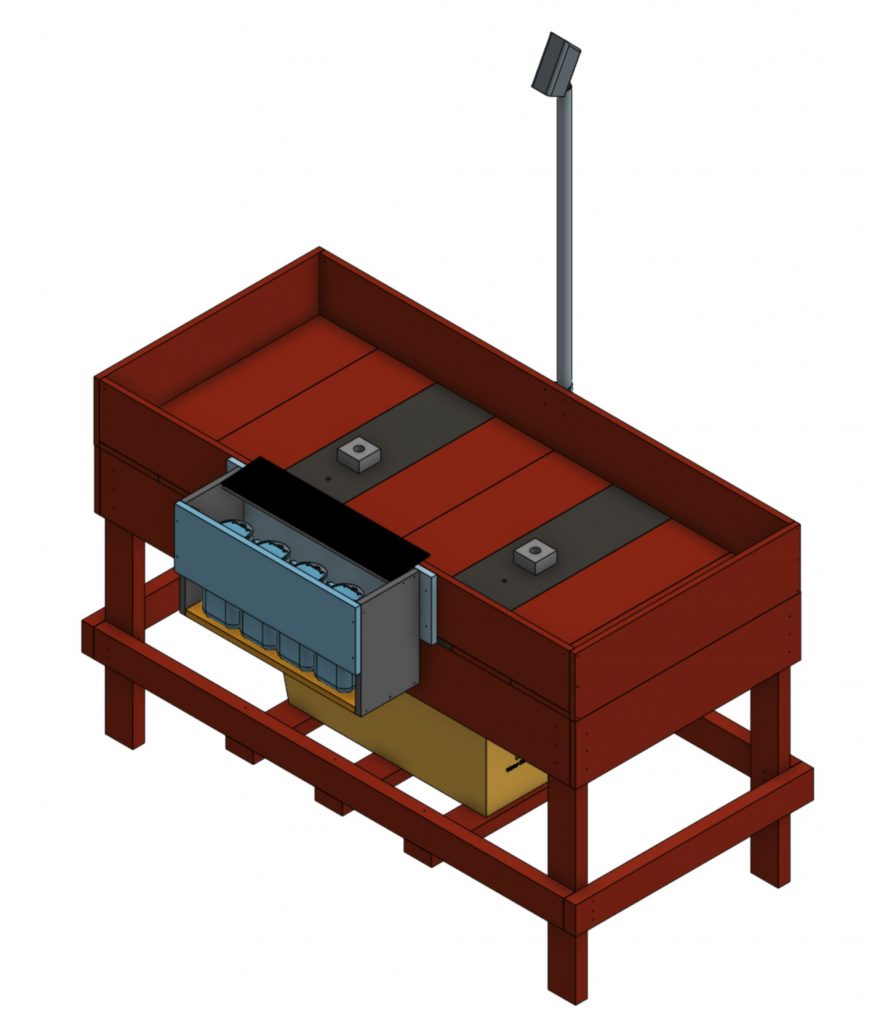
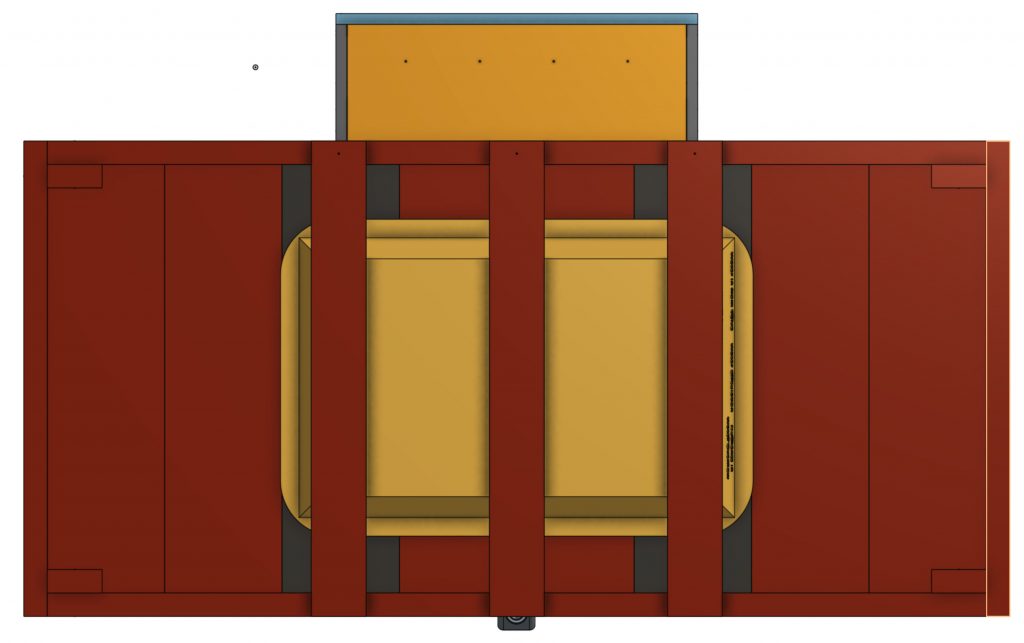
The solar panel normally fully covers the jars. I wanted you to see the jars beneath the panel.
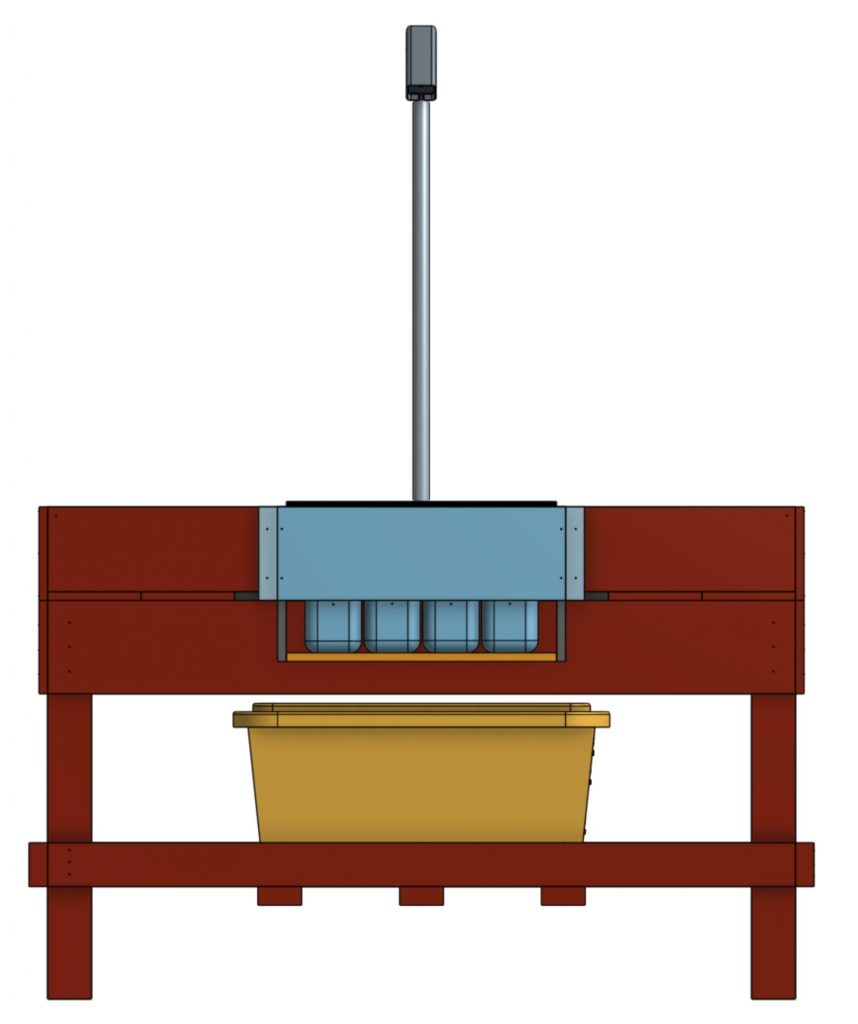
Make sure the water reservoir lid has some clearance of the bottom of the frame.
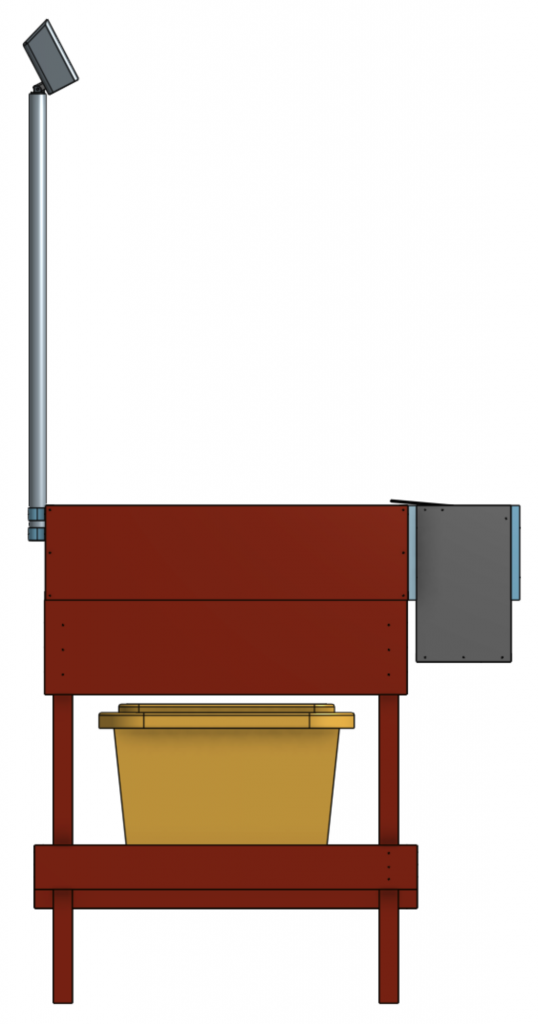
The solar panel is not forgiving so make sure that the inner diameter of the box that holds the nutrients holds your solar panel properly.
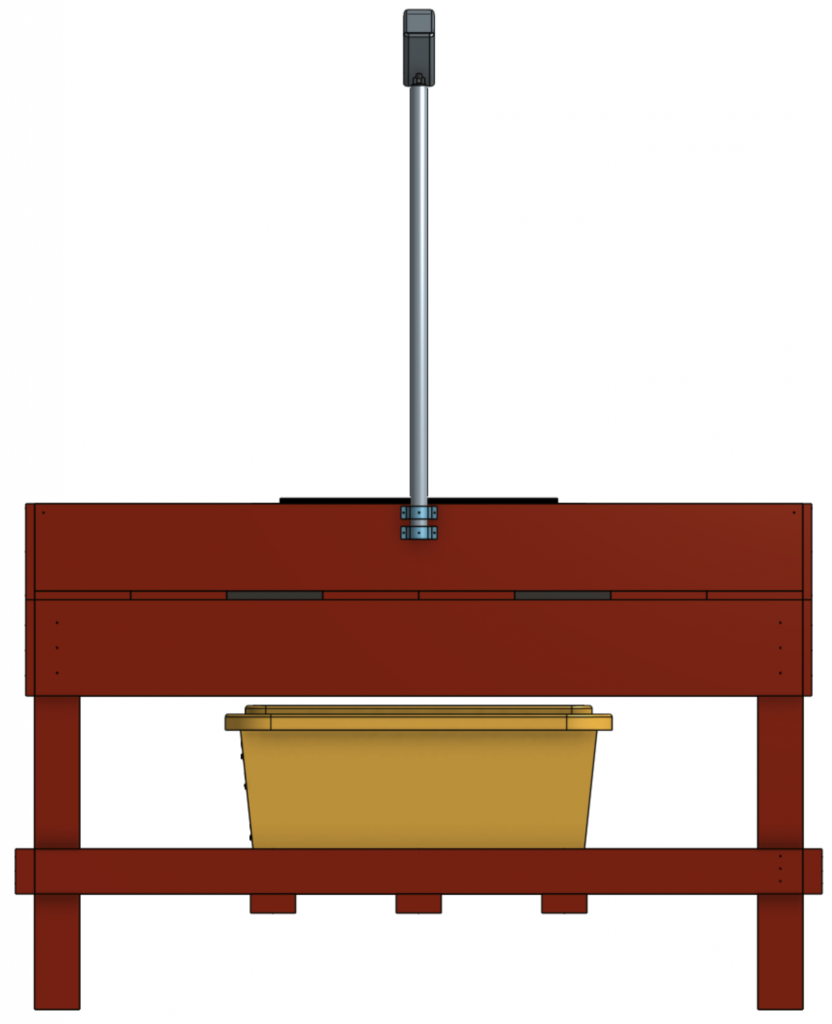
Throughout the build be mindful to double check the fit before committing to the cut.
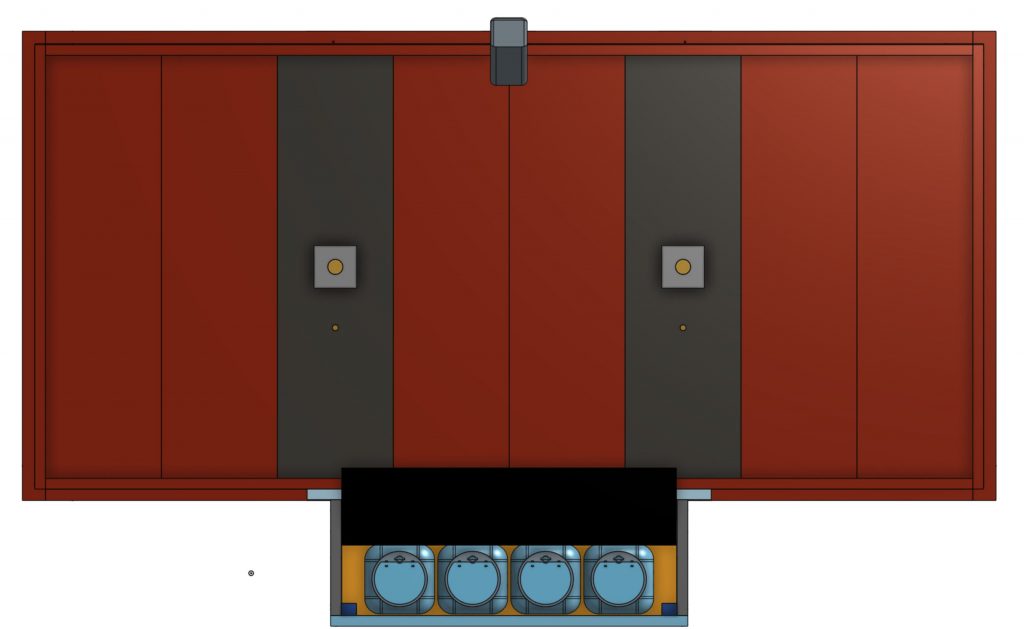
The central main drains allow the water to easily flow back to your reservoir.
Make sure your reservoir has good support.
Very important is the internal diameter of the nutrient box can hold the solar panel. Which is 550mm on average. Measure yours and adjust your box as needed.