The focus of this how-to document is to explain the reasons we use Wifi to connect to your Growbot, to give you an overview of all the specific parts of the Growbot, and to give you step-by-step directions.
Once you get started, this set up should take 10-15 minutes.
Why you connect to Wifi
GrowBots use your home wifi once an hour during the day when there is full sun to do the following:
- upload the latest beautiful pictures from your garden so that we can generate the daily videos
- upload watering logs to the server which is used error research
- upload the amount of power generated through the solar panel
- download software updates so that your machine gets access to the latest updates
- download configuration changes to optimize the performance of your machine
The rest of the time your GrowBot is circulating highly oxygenated and nutrient-rich water to all the roots of your plants. The circulation helps to create the optimum environment for growth and nutrition absorption. If there is not enough sunlight, your GrowBot will be waiting for full sun.
.
Overview of the Different parts your Growbot
This is the smart camera.

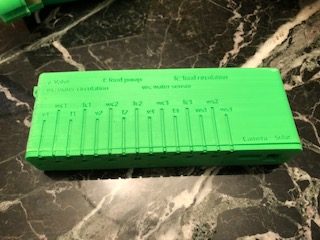
This is the controller.
This is a common USB wall-wart.

Directions
Now, let’s get started. Please finish these steps in order.
- Turn on the smart camera by connecting it’s USB cable to a power source. The most common options are a portable USB charger, laptop, PC or wall-wart.
- this is the same thing you do when you charge most cellphones
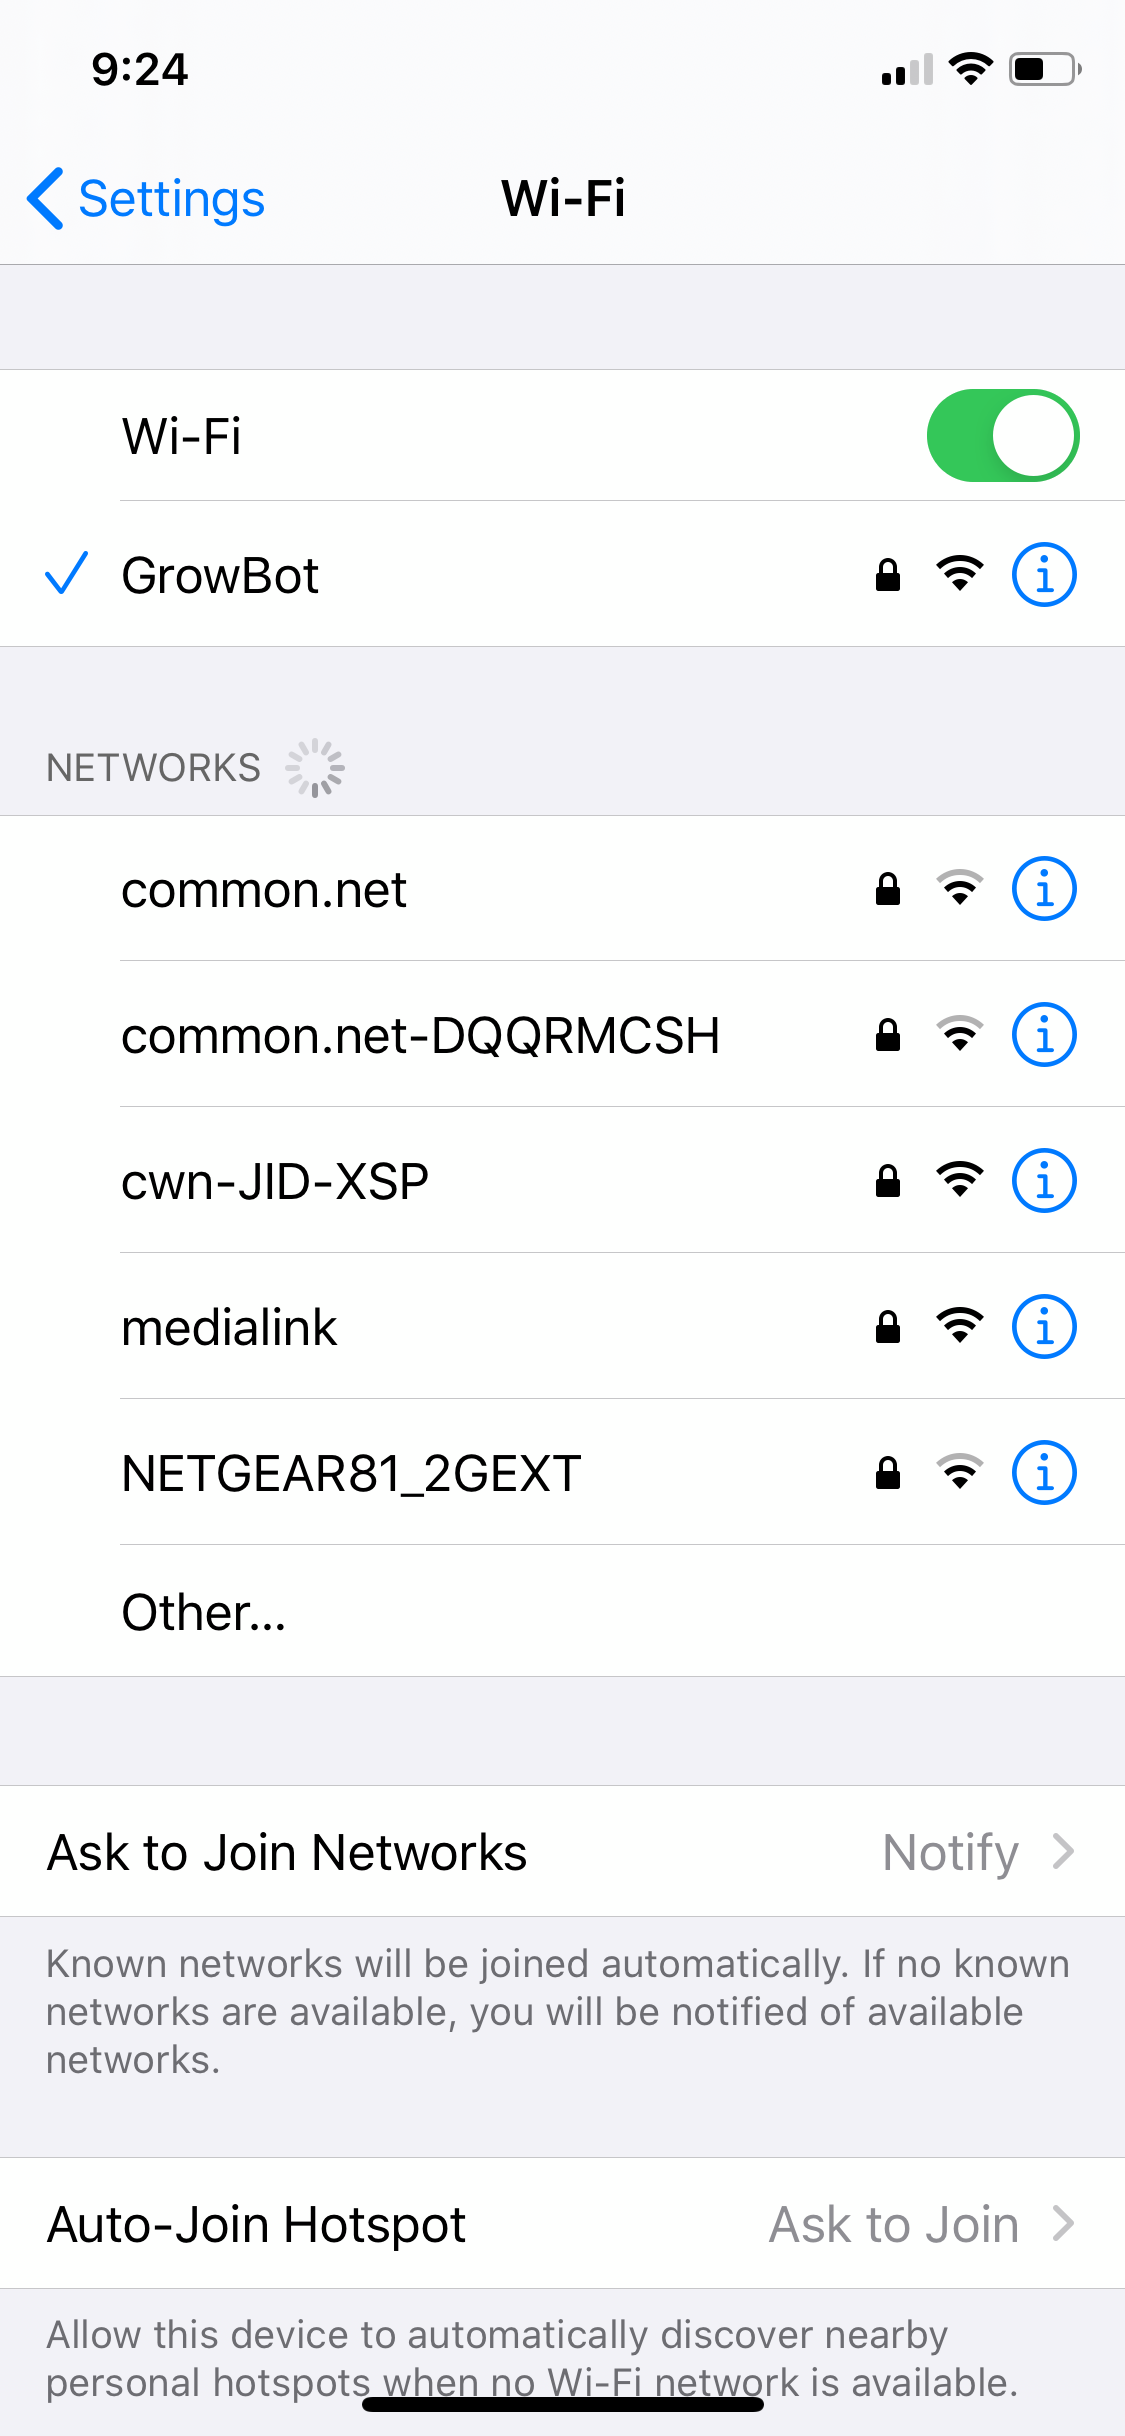
- Wait a few minutes for the GrowBot network to appear on your list of available networks . This list is found in your wifi network settings on your cellphone or computer. Click on ‘Growbot’.
- Log into the GrowBot network. This is the password 5109030644 unless we emailed you a specific password.
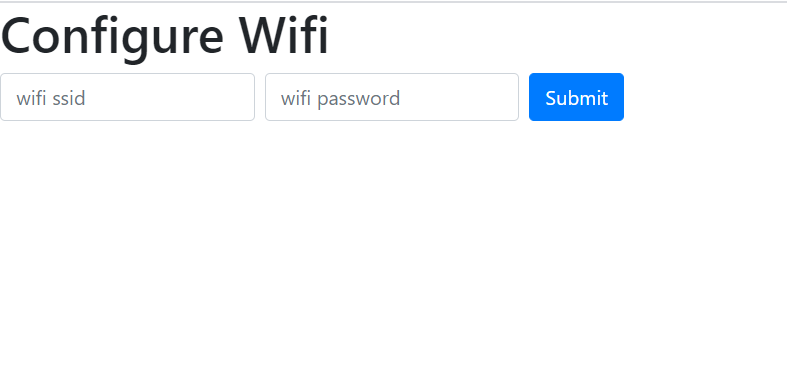
- Go to http://192.168.4.1 and enter jimmy / test123 as the user name /password. You should see this:
- On this page you will be asked to enter your local wifi network name and password. Both are case sensitive. This is what you will see:
- If you were successful this is what you would see:

- Wait a few minutes and click on the hyperlink provided below to check your activity log to see if it logged in to your local network and uploaded data successfully. The activity log is where you can see activity happening with your food growing robot. To do this follow these steps:
- go to https://mygrowbot.dwalliance.com/store/login.php
- log in
- click ‘Profile’ then click ‘GrowBot Logs’
- you should see recent activity (please be mindful that times shown are for the US West Coast.)
- If you see any new activity in the log your GrowBot is able to get online and is now properly configured to use your wifi network at home. If you don’t see activity after you have configured the wifi, check your local network to see if the GrowBot network is back. If the Growbot network is showing but you can’t log in, you might have made an error entering your UID and password. Make sure your 2.4ghz wifi network is on.
- Now it’s time to reattach the smart camera to your Growbot.
- put the usb cable down into the white pole
- put the USB cable through the frame. There is a hole at the back of the frame in the upper right corner. Thread the cable through this hole.
- plug the cable into the control board. The port is located on the bottom of the control board, on the right side, marked ‘camera’.
Once the wifi configuration, camera reattachment, connection to control board is done the GrowBot this part of your set up is done. The only time you would need to repeat GrowBot wifi configuration is if your wifi credentials change, like if you got a new router.
* Please note GrowBots presently need 2.4 gigahertz wifi service. Most wifi routers will have this enabled by default.